Hello!!
My first blog post for
Imaginarium Designs
and I've enjoyed gathering some lovely chipboard designs
and creating some projects..
I love to give handmade cards,
so naturally I enjoy putting them together too!!
'You are Lovely' card
I had some pretty papers leftover from a couple of projects so decided to make a set of 3 cards to add to my stash so they are ready to go if I need one quickly!
The Oval Swirly Frame has simply been inked - the Leafy Flouirsh has been covered with a coat of Crackle Paint, when it had dried and crackled a little adhesive was added randomly and sprinkled with some 'Prills' and micro beads.
'Blessed' card
I've cut a patterned paper to cover the card front, a paper doiley and a little fussy cutting, adding a couple of flowers finishes the card.
Another 'Leafy Flourish' with a coat of Crackle Paint and while it was drying I sprinkled over some glass micro beads - they add a soft texture that is interesting.
'Melody of my Soul' card
I like to line the envelopes with a little scrap of patterned paper, it's a nice touch?
The 3rd Leafy Flourish was first inked with a Copper ink, then a little Liquid Pearls randomly added before a little spritz of shimmer and left to dry, before adhering for the little bird to sit on.
The three cards make a lovely set or each as a nice Thank you, Birthday, or just Hello card for someone.
I also looked at these 'Thistles'
and imagined our niece sitting in a field of wildflowers
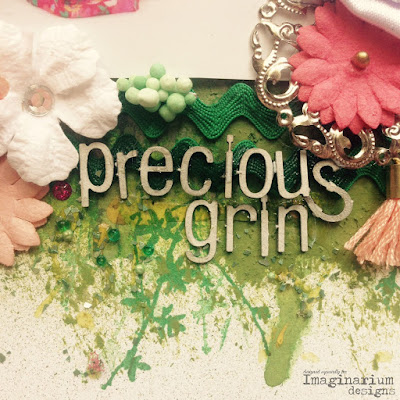
'Precious Grin'
I started by stamping some twigs and leaves towards the bottom of the white cardstock, added some misting - and the title
The Thistles were misted then a pinch of 'Flower Soft'
You know those flowers with long wires? They are easy to twist into a leaf shape - have you done this before?
How beautiful are the Dragonflies wings!! I've swiped some ink across and the body has a coat of glossy accents - simple!
And some of you might be getting children ready to start back at school, or maybe they already are or perhaps you are like me and have 30 years, over 3 children to catch up on!!
However I still procrastinate as this is our niece!
'School photo' layout Tutorial
I used the width of my ruler to make a border on a piece of A4 gloss card
I then used the chipboard 'scraps' to make a border -
I sprayed the frame with gesso -
Then misted with a few different Green and Yellow
shades to give a little colour -
When it had dried a rubbed the surface over with a Green ink pad -
Then added a bunch of colour co-ordinated embellishments to fill in the gaps -
Little brads, seed beads, tags and a title of SMILE..
It's quite a long post so,
you get a gold star for making to the end - Thank you!!
Be sure to check the blog for more inspiration,
Alison xx


Oh wow Alison, you have been busy..... Just love the cards and both your layouts are just beautiful!!
ReplyDeleteThank you so much Tania, much appreciated!!
Delete