Monday 25 July 2016

Kraft Plus - July challenge

Today's favourite..


This was created for the Kraft Plus challange - 
The theme is the Moodboard and Sheet Music


You need to start with a sheet of Kraft


We found a little scrapbook shop in Geelong 'Create on Ormond' on our way to Unmasked 2016
and this is where I picked up a roll of Music washi tape and the Teresa Collins christmas paper (Music on one side and the diagonal red stripes the other - which I also used over the weekend) - this was randomly torn and layered over the page.
At Create on Ormond I also found a TCW 6x6" Music notes stencil so there is some spots with a dimension paint in Viridian - also roughly swiped around the edge for a border.
I fussy cut the christmas paper into music notes and adhered this over and in a vertical fashion.
The Dusty Attic chipboard 'fence' was snipped down so it looks a little like 'notes'? which, along with the title was simply inked with pink.
Add some flowers - which were meant to be for Melissa Kennedy's layout kit? haha 
Add some hemp twine around the bottom of the photo and let the tails twirl to the sides.

Emily's Kokoda Graduation selfie,
Alison x 


Green, Green and more Green

Green, green and more Green


Starting with a sheet of Ultimate Crafts 'Snow White' -
I very lightly sprinkled 3 shades of 'Green' "Color Crush" horizontally across the page and lightly spritzed with water to activate the pigment powders, while it was still wet sprinkled a little more!!
Cut a large banner and fashioned a banner from the Prima packaging of a flower stem and layered them all together - I love to use packaging as a sneaky bit of colour and strength.
The 2 flourish pieces are Dusty Attic chipboard coloured with Tim Holtz crayons, and wet for coverage.
A bit of floristry and the layout is done,
will add some journalling along the right side of the photo..

Our Emily,
Alison x

Free to be Me

Hello!!

How many Selfies is enough?
..apparently there is no correct answer or 
silly question Mum!!

Free to be Me


I started with a sheet of Ultimate Crafts 'Snow White',
sprinkled some 'Color Crush' (yes, correct spelling! lol)
then water
...and dry
How good is that fabulous mask!! Thank you Scrapmatts
and the 'Free to be Me' title
Add a bit of muslin, a few of Melissa's freebie flowers at the Unmasked retreat 2016 
and a photo!

Photo of our Emily wearing similar colours on her shirt - perfect match!
Alison x


A page for Zane..

My friend Shelley lost her big grey dog, Zane the other day, so while I was away at UNMASKED 2016 I thought I would make her a page to put a photo on and do a little journalling, when she is ready xx


The papers are all Kaisercraft 'Cottage Rose' - a collection of pink roses but I turned them over to reveal this subtle grey - I added a few touches of Pink and Green with the white.
I fussy cut all the frames from one sheet - a great way to create embellishments or simple layers!
Slide a photo into the Grey frame and it is ready.

He was the nicest of the big dogs who guard Shelley's home,
Alison x

Hello Today

Hello everyone!!

While I was at Melissa Kennedy's UNMASKED 2016 Retreat in Geelong this past weekend, I had a little time to create some 'just for fun' pages..


I started with a sheet of Ultimate Crafts 'Snow White' Cardstock and sprinkled some Brushos from the 'natural' box - left it to dry naturally while I continued chatting and eating!!
I came back a little later, tore a strip of 'Christmas Paper' - Teresa Collins, which had Music Notes on the reverse for another challenge..
I stamped with Indigo Blue's 'Bubbles' from the Dina Wakely 4 colour pad - 
added some Dusty Attic chipboard, which had simply been inked in two colours - 
adhered a flower or two...
some stars 
and a Title
done!

Two of my favourite little people,
Alison x


Friday 15 July 2016

"9 squares" layout by Alison Bevis

Hello again!!
Today I am sharing a layout featuring the 
'SEA BREEZE'
collection of dies and the 6x6" Paper Pad.

I started by cutting 8 Nesting Squares - the 2nd largest size.


and then began creating little scenes on each square, 
with some Adhesive Chipboard,


along with some Cabochons,


and a Trinket,


a bunch of diecuts from the
SEA BREEZE
collection,


a PHOTO 
of course,


adding some twine to feature your photo!!
And perhaps a flower too?


a little Liquid Drops 3D Pearls,


and some Glitzin' Glamour, for sparkle,


and distress the edges too,


Each of the squares could be layered onto a piece of patterned paper and adhered to the front of a card,
but,
I adhered them in a grid and made a layout,


Another page for our niece..


Products used:


Bulk White Flowers:

Liquid drop 3D Pearls 
Seafoam
Cottonball
Pewter

Glitzin' Glamour 
Silver

We'd love to see what you've created with the beautiful
SEA BREEZE collection, so be sure to share,

Keep creating,
Alison


Monday 4 July 2016

Courage, the Shore and the Fish - Card & Layout combo

Hello everyone!!
How exciting, my FIRST day on the Couture Creations blog!!
I wasn't sure what style of project to make so have chosen something simple with a bit of an interactive feature? This idea is great for kids cards too..
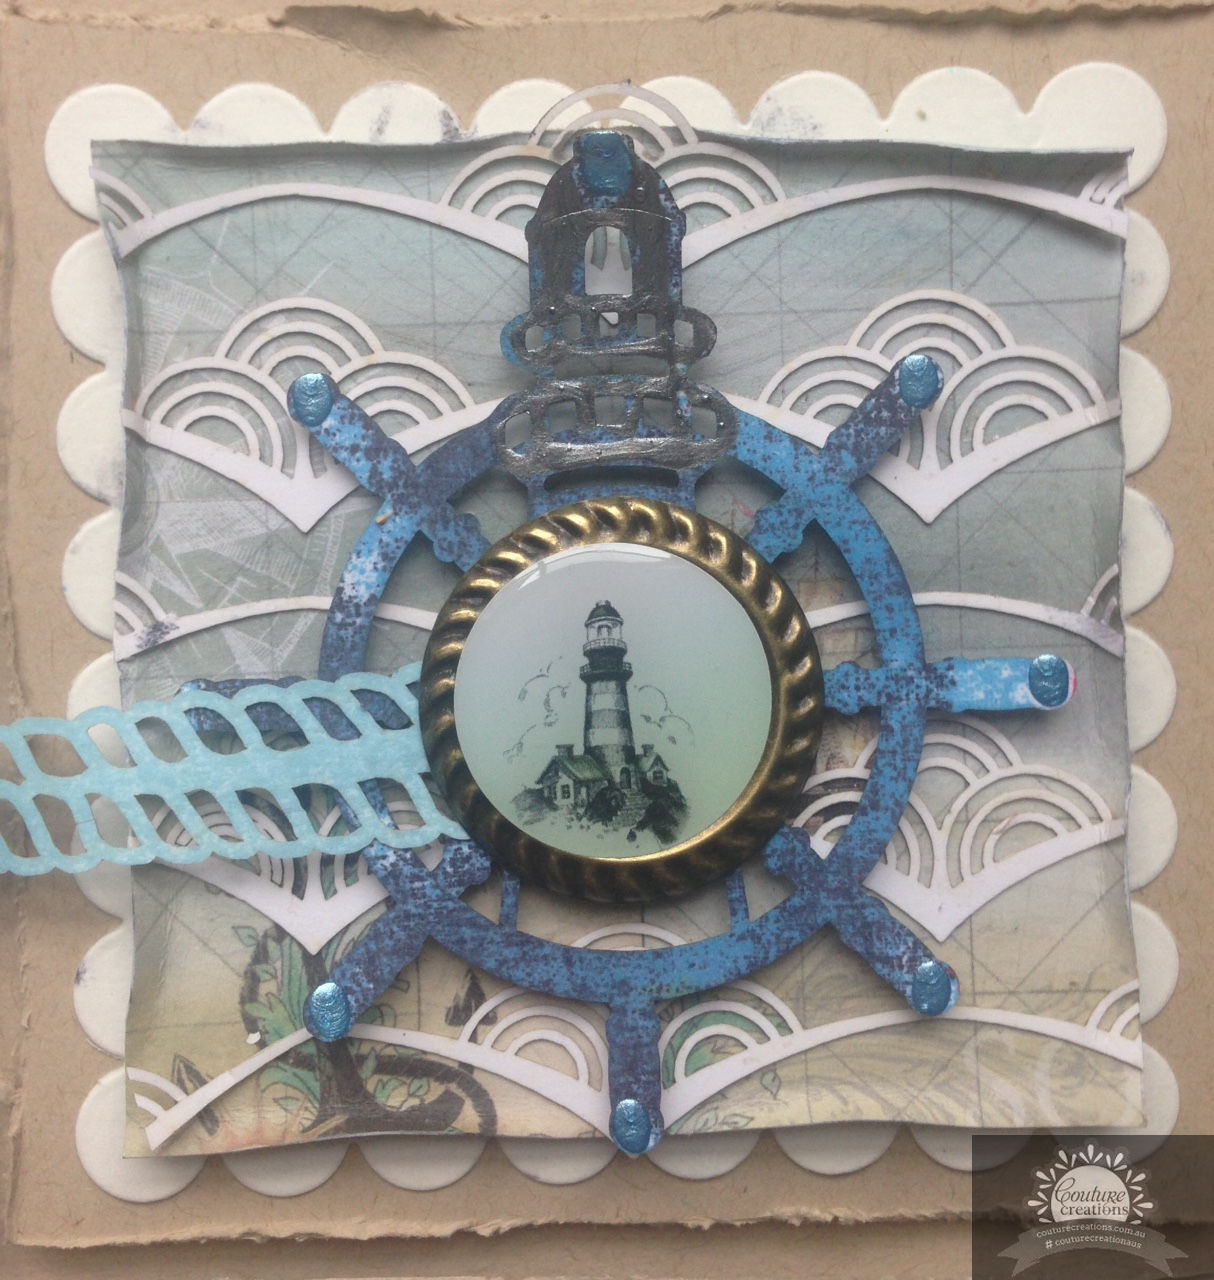
Sea Breeze card

The first step is to die cut an aperture into the front of your card - I like to attached the cardstock to the card base and die cut through all the layers in one pass.


You'll notice I changed my mind and added another base layer and have used this as the frame.
Don't toss the scallop square...it will come in handy!


You might do this when you make a 'shaker card' also - I decided to have the 'shaker' element a small snaplock bag of 'clear hair gel' which I squirted a little mist into - you'll see I have two different gel bags for two projects... just for a bit of fun!!
Adding a couple of different colours will give you a swirled effect - just be sure not to mix it up too much?


When you adhere the gel bag to your patterned paper, you will need to add Foam mounting tape around the outside of the bag before attaching to the front of the card - I have added two strips on top of each other to allow the bag enough height to be flat on the card.


The stamp set 'On the Ocean' has that great image of a Sailing ship which I stamped in grey ink onto a pale patterned page from the 6x6" Paper Pad and fussy cut it out -


 I also stamped the 'Courage' sentiment and cut this into strips - adhered with foam strips.
It's a bit nifty that the gel leaves little bubbles... which of course, add to the water effect?


By cutting the sentiment into strips it allows you to add 'The shore' to the opposite side and cluster with the ship and the Metal Trinket, of  'the shore' - perfect colour match too!


I've also added a piece from the Ephemera pack, on the left hand side (I snipped it in half, means half for another project if you're budget savvy like me?)
...a masculine card!!


..and while this is something you may not have tried or you are not a card maker... 
you can also incorporate the 'gel bag' into a layout -
the gel does eventually dry out over time so is not archival quality, but rather a fun element to add to a mini album or such?

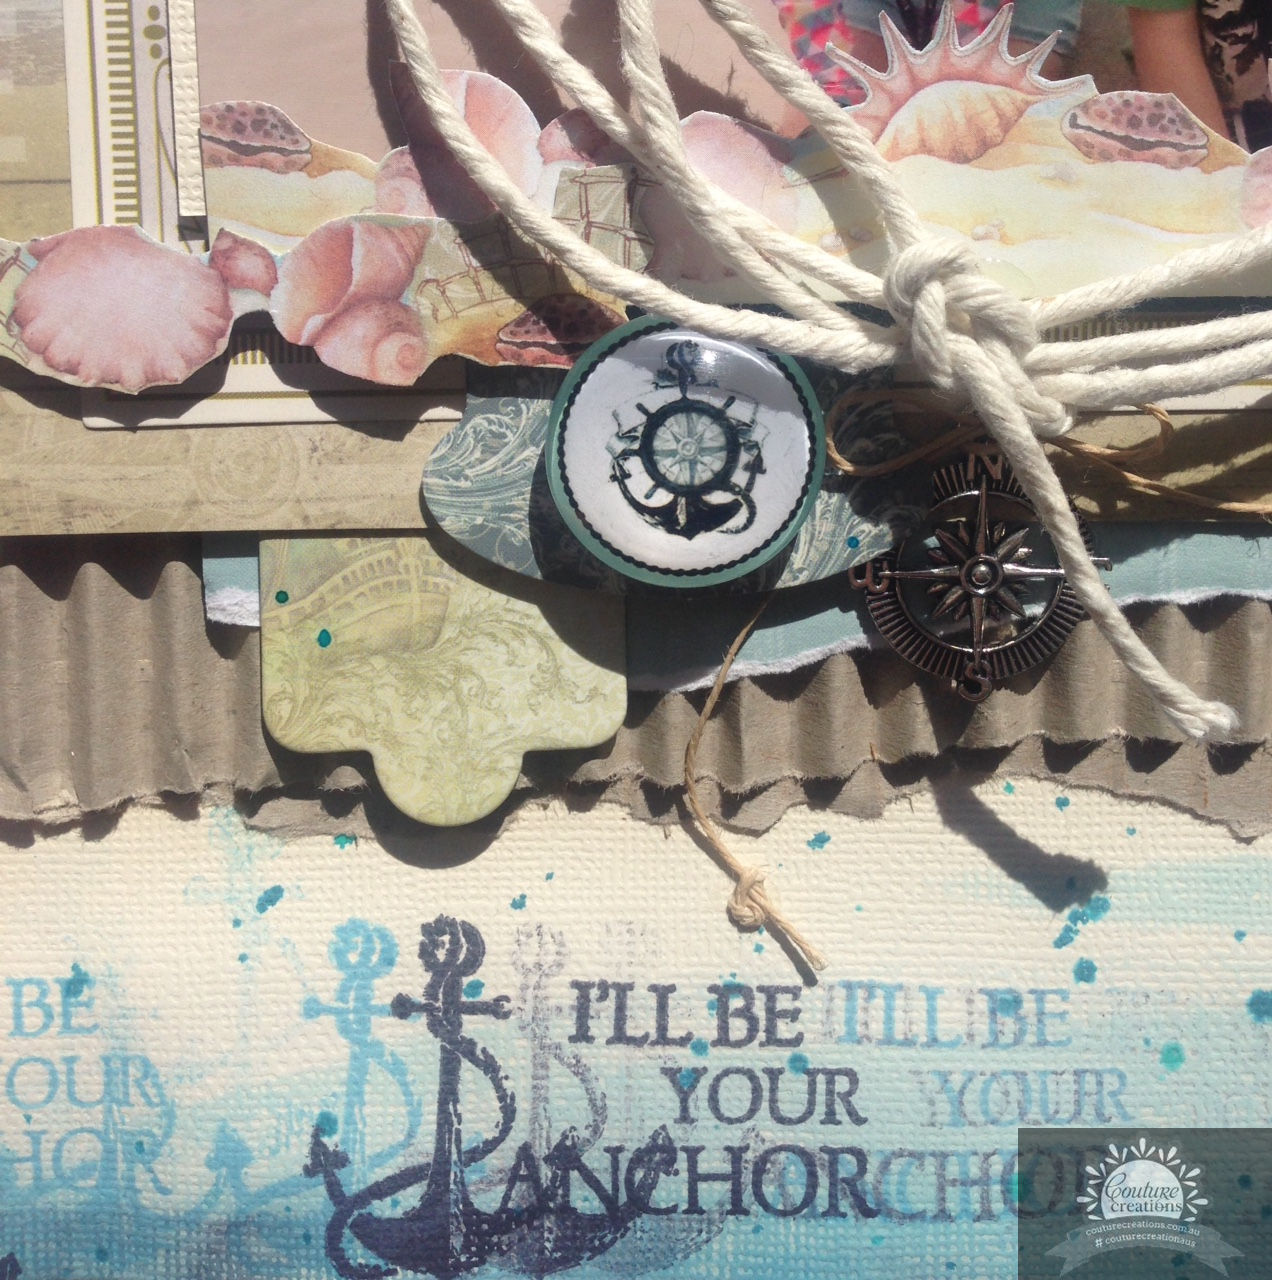
Sea Breeze layout with a 6x6" Paper Pad

Starting with a sheet of cream cardstock I created a background with ink and mists -


 the Ship's Wheel has been stamped in pale blue and pale brown across the page and then some flicking of co-ordinating blue and brown mists


...again you'll need to raise the layer with the gel bag with 2 strips of foam tape


I layered the photo on various papers from the 6x6" paper pad and the frame is from the Diecut Ephemera pack - instead of throwing away the Scallop Squares from the card I've include them on the layout too (..more budget savvy tips!) 
For the Banner element I started by adhering the pre-knotted twine across the base of the photo and then foam mounted the banner pieces - easy!


The top flower is such a pretty flower... you can pull it apart and have 3 flowers, which you can then ink, colour and adhered to your project - the flatter ones are great to stamp onto also!


Paper flowers are also great to colour with mist or ink - scrunch while it is still 'wet' and allow to dry so the flower looks more natural?


A seagull Trinket watches over the fish and the fishing girl from the top corner - 


I do love to fussy cut - the 6x6" Paper Pad has a sheet full of great images, including these 3 fish! 
I die cut the window with the Nesting Heart set... so the fish could 'swim' in the water?


The finished layout, 
...just needs a little journalling of the story!!
On the pale heart will be perfect, don't you think?


Don't forget to check back tomorrow and see what the other ladies have created on the 

Products used:


Thank you,
Alison


I'll be your Anchor - Sea Breeze Layout

Hello again, so glad you came back to visit!!

Today, I have again created a layout with a 6x6" Paper pad... and a Stamp Set, Diecut Ephemera, Adhesive Chipboard and a Cabochon!

I've started with a sheet of  Cream cardstock, and proceeded to swipe various shades of blue ink around the outside - to make a border - sprinkle a little blue mist also, and then,


start stamping with the 'On the Beach' stamp set from the Sea Breeeze Collection - 
I focussed on the Anchor and the Sentiment to match, in 3 shades of blue 
and added 2nd and 3rd generation stamping on the edges.


Once the background is 'finished' set it aside to dry - 
I've taken a few sheets from the 6x6" Paper Pad and layered them under the photo - even left the barcode strip attached! 
Attaching the layers onto a piece of corrugated cardboard, gives strength and dimension too!
You might notice the frame from the Diecut Ephemera pack too?
There is even a little fussy cutting... the shells along the base of the photo.
Adhere a circle of thick twine around your photo - a spot of glue where the twine overlaps and another spot to adhere to the photo.


It's easy then to adhere the 'photo' to where it looks right..


I began embellishing by adding a Cabochon and an Anchor charm, along with some pieces from the Diecut Ephemera pack between the layers of patterned paper.


The finished layout..


Don't forget to check back tomorrow and see what the other ladies have created on the 

Products used:


Thank you so much for visiting today!!
Alison